
This is our last and easiest lesson! If you have made it this far you only have a little farther to go and then you will have a beautiful hand-made quilt!
The first step after quilting your quilt is to trim the backing and batting even with the quilt-top: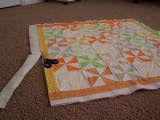
Then you will cut four 3-inch strips from your binding fabric. You will iron the fabric in half lengthwise (in the picture I have a 3-inch strip on top and an ironed 3-inch strip below):
To bind your quilt, you place an ironed strip along one of the edges of your quilt: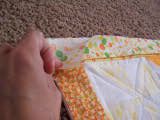
Pin the binding in place and sew using a 1/4-inch seam. (You will do north and south edges first):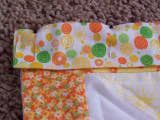
Once you have sewn the binding on the north and south edges, fold the binding over to the back of the quilt and pin in place:
You will hand-sew the binding in place using a small, hidden stitch: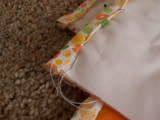
This is what your quilt will look like with north and south edges done:
When you sew on your east and west edges, it is important to leave about 1/3-inch of extra fabric hanging over the side: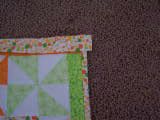
Once you have sewn it in place with a 1/4-inch seam, turn your quilt to the backside and turn the edge of your binding up:
Turn the 1/3-inch piece of extra fabric in towards the quilt: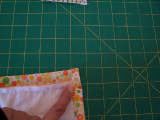
Then fold the binding over and pin it into place. Hand-sew your binding to the backing:
Guess what? All you need to do now is to clip your strings and you are done!!!
I decided to hang my quilt in my craft area to provide some color and inspiration:
Be sure to hang your quilt in a spot that does not receive direct sunlight because that will fade it. To wash your quilt: Wash in cold water on gently cycle and hang dry.
Congratulations! Our quilting bee has been fun!
Please be sure to post a picture of your completed quilt when you are done (even if it takes you a while longer to finish it!) and if you don't have a blog please email me a picture so I can post it on my blog.
Sunday, February 12, 2006
Quilt Lesson #4
Subscribe to:
Comment Feed (RSS)


|